
Portrait tattoo stencil guide
Faces are the hardest thing to turn into a stencil. Why edge-tracing tools lose them, how to pick a photo that works, and how AI line styles and Touch-up get you to a clean, printable portrait.
Updated November 2026
Why portraits are hard for stencil tools
Most free stencil makers, including the Classic mode on this site, work by finding edges: places where the photo jumps from light to dark. That is perfect for a drawing, a logo, lettering or a flower against a plain background, because those images are made of edges.
A face is not. The things that make someone recognisable are soft: the curve of a cheek, the shadow under the lower lip, the fold of an eyelid, the bridge of a nose. Lit well, they barely have an edge at all. An edge tracer sees the strong outline of hair against the background, a few dark spots for the nostrils and pupils, and almost nothing in between. Turn the threshold up and you get blotches and skin texture instead; turn it down and the features vanish. Hair has the opposite problem: thousands of fine edges, which come out as a tangle that no artist would ever put on skin.
That is not a bug in one tool. It is the limit of the method: a threshold can only keep or drop what is already a hard edge in the photo.
The same portrait through both engines
Examples of our AI line style, made with GPT Image 2 in ChatGPT; both portraits are fictional people. Left the reference photo, middle the free Classic stencil with default settings, right the AI line style. Classic keeps the outline and hair mass but loses the eyes and mouth; the AI draws them as lines.
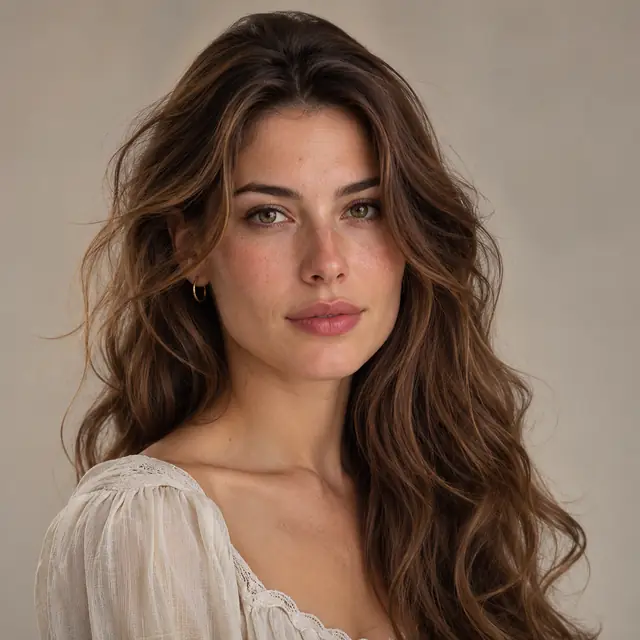
PhotoPortrait 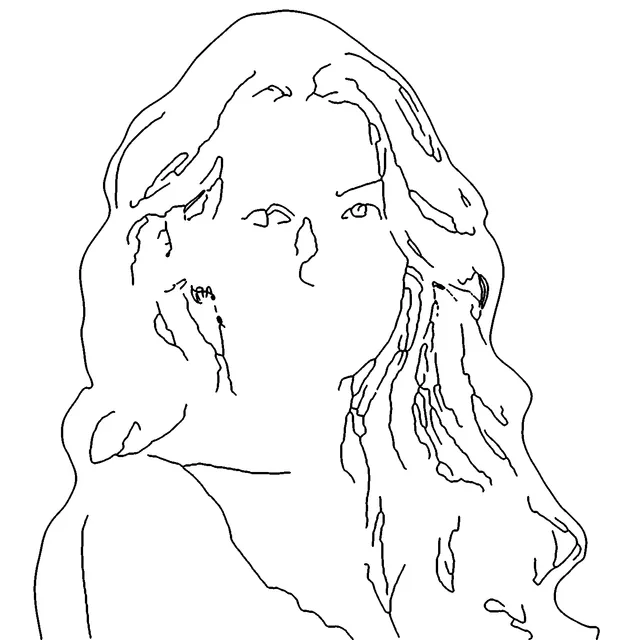
ClassicFree, on your device 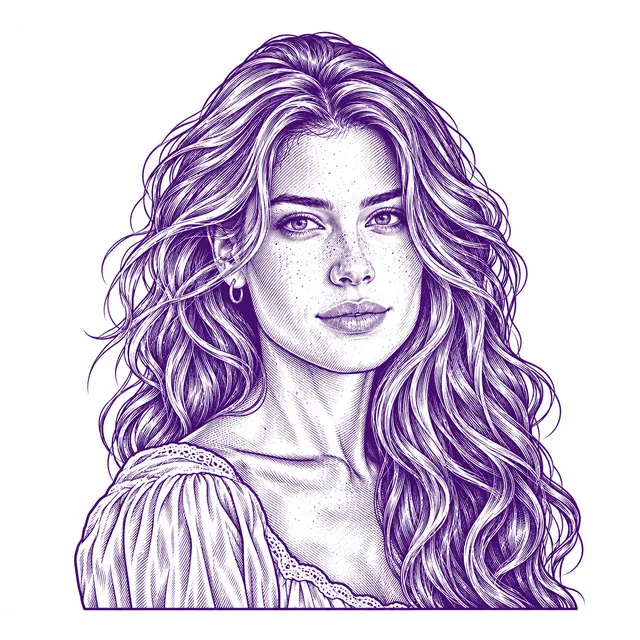
AI line styleStudio plan or pack 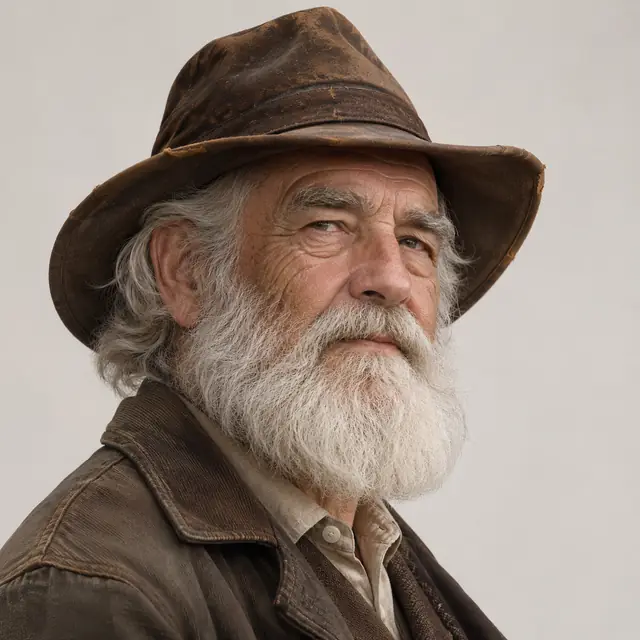
PhotoBearded portrait 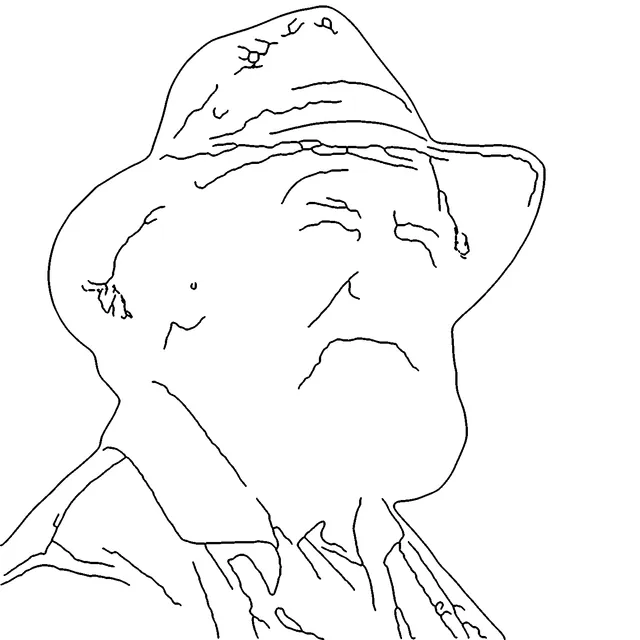
ClassicFree, on your device 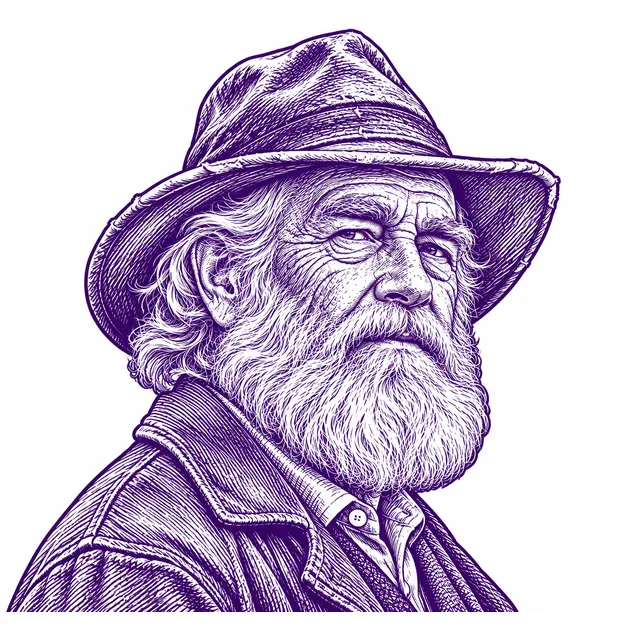
AI line styleStudio plan or pack


How AI line styles help
An AI line style does not trace the photo. It redraws it, the way an artist would on a lightbox: it decides where a contour belongs even when the photo only has a change in tone, closes the line around an eye, and turns a mass of hair into a few flowing strands. On this site the AI is GPT Image 2, and you get its lines as they come back, not retouched by us. There are three styles:
- Outline: contours only. Good for a fine-line or minimalist portrait, or when you want to do all the shading freehand.
- Detailed: adds the inner lines of the eyes, lips, ears and the main strands of hair. A solid base for most portraits.
- Shading guide: adds hatching where the tone goes, so the stencil shows you where to build the shadows. This is the one realism artists usually reach for.
AI lines are part of the Studio plans or a one-off pack. A run the AI declines (famous people and protected characters are refused), a run that fails, or lines that fail the print checks are never charged. The free Classic version is always shown next to it, so you can compare before you print.
Choosing a photo that works
- Resolution: the face should be at least 1000 pixels tall. Screenshots of social media posts are usually too small and over-compressed.
- Light: soft light from one side shows the shape of the face. Flat flash light hides it; hard midday sun gives black eye sockets.
- Focus: the eyes must be sharp. A soft background is fine; a soft face is not.
- Nothing in the way: sunglasses, hands, hats with deep shadows or hair across the eyes make the features guesswork.
- Unfiltered: beauty filters smooth away the very details a stencil needs, and coloured filters confuse tone.
- Permission: use photos you took or were given, and get consent from the person in the picture, especially for a memorial piece.
Touch-up: the step that makes it yours
No stencil, AI or classic, should go on skin unchecked. Open Touch-up in the editor and switch on the photo underlay, so you can see the reference under the lines. Then work through the face in this order:
- Eyes first. Make sure both irises are round and the same size, and that the upper lid line is continuous. A stray dot in the eye reads as a different gaze.
- Nose and mouth. Keep the nostrils and the corners of the mouth; remove extra lines on the cheeks that will read as wrinkles once tattooed.
- Outline. Close gaps in the jaw and hairline, and erase background fragments.
- Hair. Lighten or clear dense areas. A few strands showing direction are worth more than every hair.
Touch-up has a brush, an eraser, clear fill, lighten and darken, and it works on Classic and AI stencils alike.
Size: give the face room
Small portraits age badly. Lines spread a little in the skin over the years, and features that sit 1 mm apart today blur together. As a rule of thumb many artists want the face itself to be at least 7 to 10 cm tall. Set the size on skin in the editor and watch the transfer badge: it flags lines thinner than 0.3 mm or closer than 0.4 mm at the chosen size. If the eyes light up, make the design bigger or switch to a simpler style. The size guide lists typical sizes by placement.
Print and transfer
A portrait prints like any other stencil: PDF at 100%, check the 5 cm bar, leave Mirror off for thermal paper. Lettering is not the only thing a mirror spoils: faces are rarely symmetrical, and a flipped portrait looks subtly wrong to anyone who knows the person. Follow how to print a stencil and how to transfer it for the details.
Next steps
Questions
Can a free stencil maker do portraits?
It can trace the strongest edges, which gives you the outline of the head and hair, but most of what makes a face recognisable is soft tonal change, not edges. Expect to redraw the eyes, nose and mouth by hand, or use an AI line style that draws them as lines.
What makes a good photo for a portrait tattoo stencil?
A sharp, high-resolution photo with soft light from one side, the face at least 1000 pixels tall, eyes open and in focus, and nothing covering the features. Avoid flash, strong filters, heavy beauty retouching and group photos cropped down to one face.
How big should a portrait tattoo be?
Large enough that the eyes are not tiny. As a rule of thumb many artists want the face itself to be at least 7 to 10 cm tall so the features can hold shading over the years. The transfer badge in the editor warns when lines get thinner than 0.3 mm or closer than 0.4 mm at the chosen size.
Can I make a stencil of a celebrity or a film character?
The AI line style declines photos of famous people and protected characters, and a declined run is never charged. Use photos you took yourself or have permission to use, and get consent from the person in the picture.
Which AI line style is best for a portrait?
Outline gives clean contours for a light, fine-line portrait. Detailed adds the inner lines of the eyes, lips and hair. Shading guide adds hatching that shows where the tone goes, which is what most realism artists want on the stencil.